This a a true "modeler's model kit." It is yet another tribute to the work of Moebius Models in realizing the ships from Stanley Kubrick's "2001 - A Space Odyssey" to a level no other production plastic model kit company has eever done before. At 1/8 scale, it is the largest scale model of the EVA Pod every produced. Larger even than the 1/12 scale Pod offered by Atomic City a few years ago, and far more cost accessible to the modeling public.
It's size allows for an incredible amount of detail to be part of the kit, right out of the box. But the size also compels and allows the modeler the freedom to express his desire to fully develop the final product - To have all of the instrument panels properly illuminated, to have all exterior lights active, to have a properly scaled pilot figure in place in the spacecraft.
It's scope also compelled a number of specialty detail set providers to create and offer phenomenal additions, to make the model come to life. We chose a number of those in the work we did. Many more are now available.
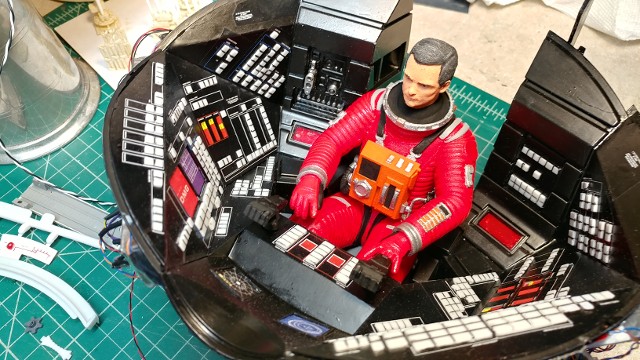
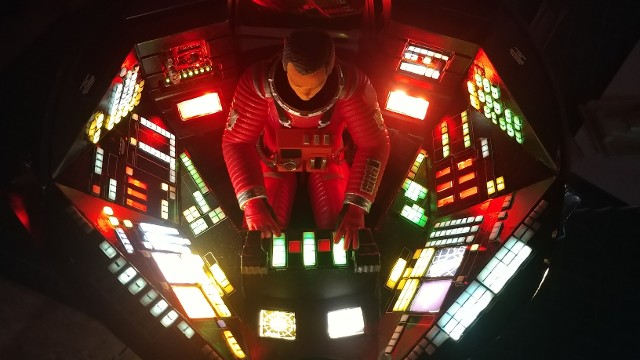
This was the interior of the Pod, mid-point in its assembly. All of the lower panels are in place, the self-adhesive, light-blocking panel applications, provided by Moebius, are in place, a number of the Ya-Monsters! LED Support Panels have been installed behind the lower panels to check out and trial fit the LEDs used to illuminate the screens and control buttons on the panels. A specially-designed 1/8 scale (1/9, according to its creator) figure of Dr. David Bowman, designed by Max Grueter of Switzerland, and made available through his Shapeways.com store - Figurative Parts. Max specializes in space suit figures and has a number of offerings in "2001" Suits available. This pilot figure is one of his most recent, and was made by "modeler demand." Here, the painted "Dave" is trial fitted in the cockpit.
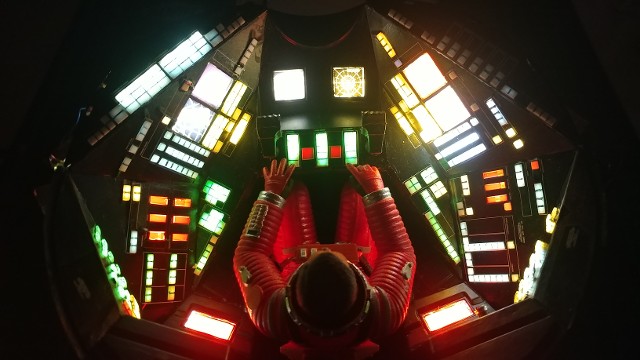
With all of the cockpit panels in place, we did a full-up test of the LED system. The system is composed of individual LEDs, used where strategically important and LED Strip sections, to minimize the sheer numbers of individual LEDs required to complete the illumination.
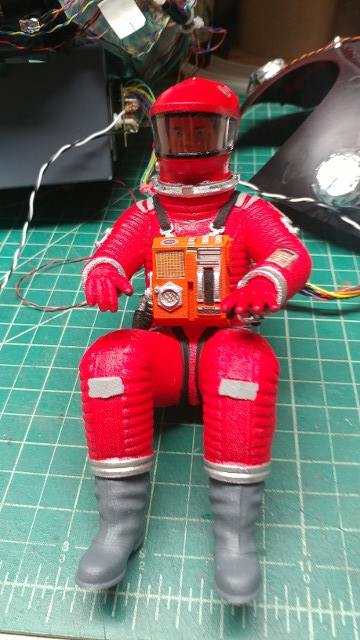
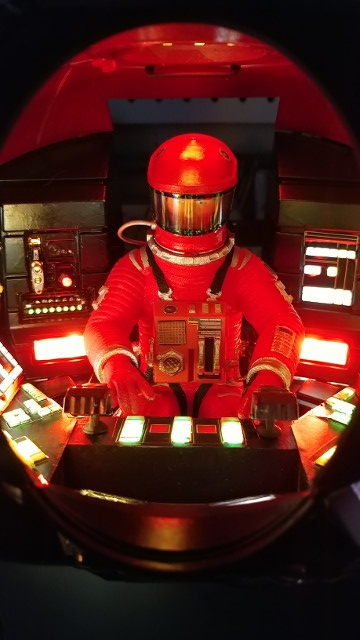
"Dave" now has all of his hardware - Helmet is on, the back-pack is complted and custome decals on the front control unit, helmet and arm patch are all in place. Bowman is now ready for permanent installation into the cockpit.
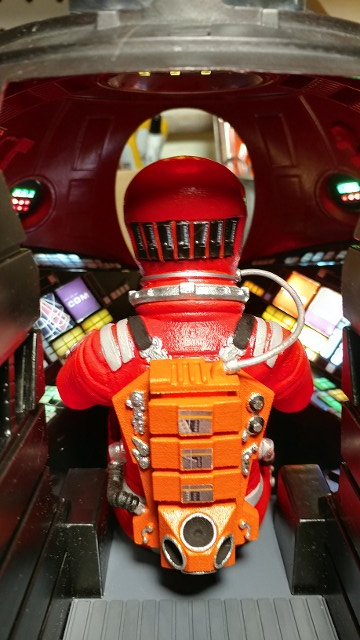
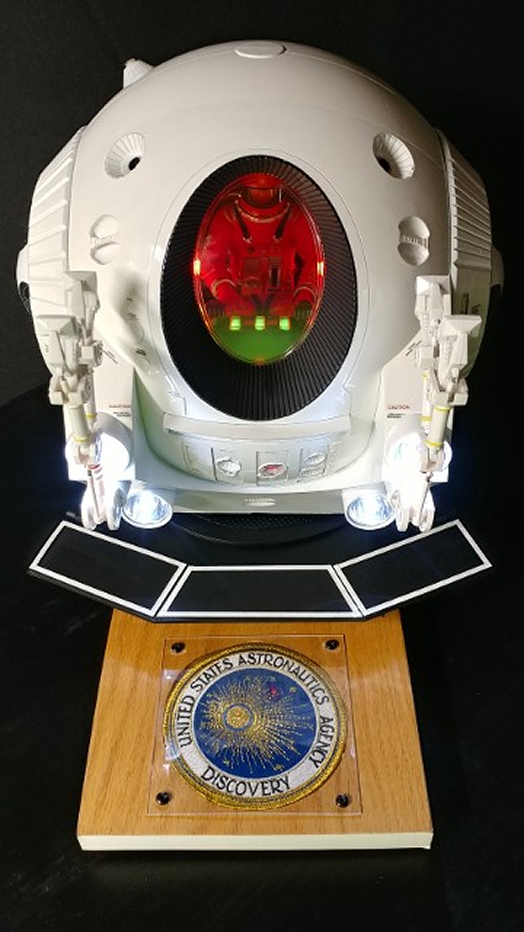
Bowman, in the Pod, as seen from behind. This was taken after the Cockpit upper section was assembled onto the completed lower section. The small circular instrument location near the front, and three sets of red illumination panels were also part of the cockpit upper section and Illuminated by LEDs.
The same view through to the front window aperture. A special 3D printed detail set, used for the Comm switches and the "explosive bolt" controls can be seen on the left of Bowman on the rear panel. The additional physical detail was incredible.
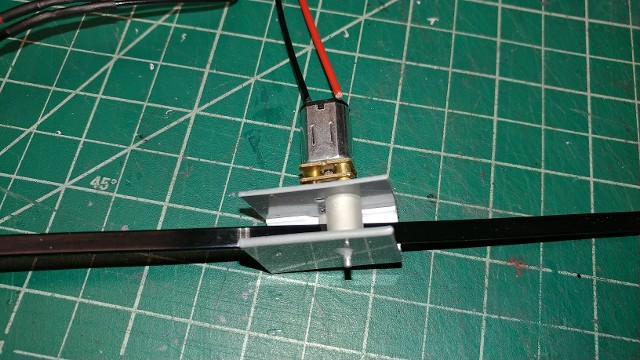
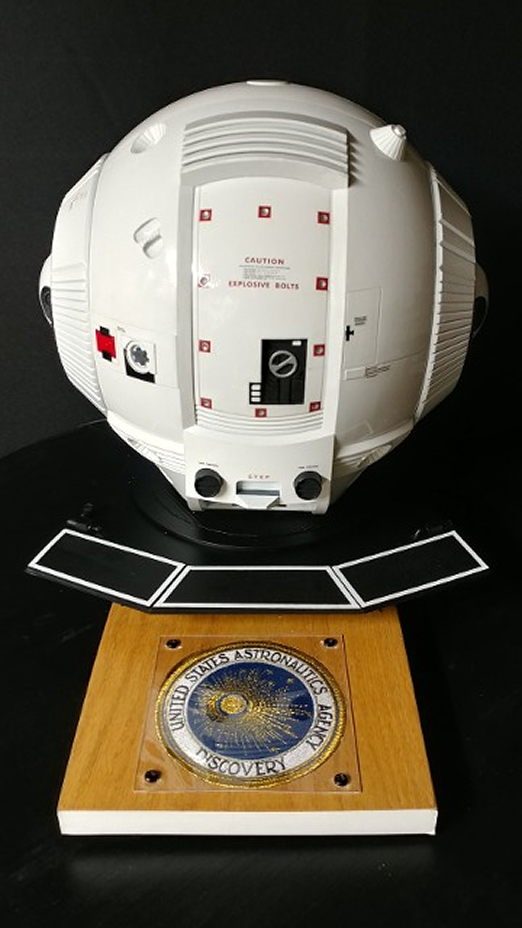
Once all LED illumination was completed and the cockpit section closed-out, the cockpit was installed into the rear half of the outer hull first, after completion of the rear pod door assembly. We checked for fit, function and planed out the location of the door drive unit (yet to be built), and the magnetic "limit switches," which would go open-circuit when the door reached them on either side. This would shut-off power once the door had reached it full-open or full-closed position. The drive was made from a low-voltage motor and gearbox set driven at 9 Vdc, the assembly used two silicone rollers, one on the gearbox output shaft and one as an "idler" forcing the drive band onto the driven roller. The drive band was the long ribbon-like section of a black nylon wire-tie, fastened to the door assembly at one end and passed through the drive unit rollers, with its "ribbed" surface in contact with the drive roller. The smooth plastic guide was added to the "inbound" side, so that the drive band would not hit anything and move smoothly.
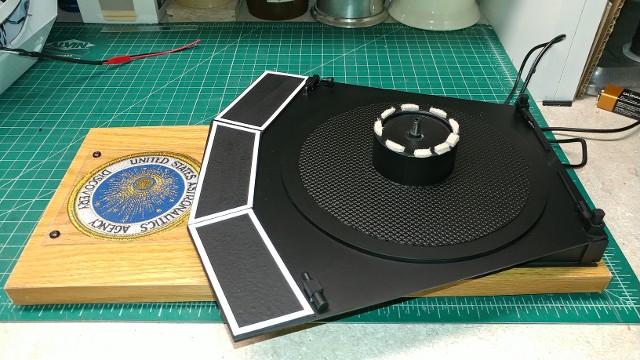
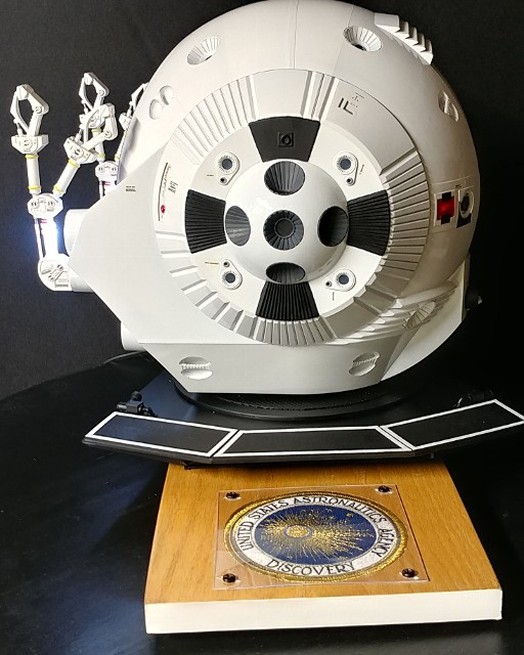
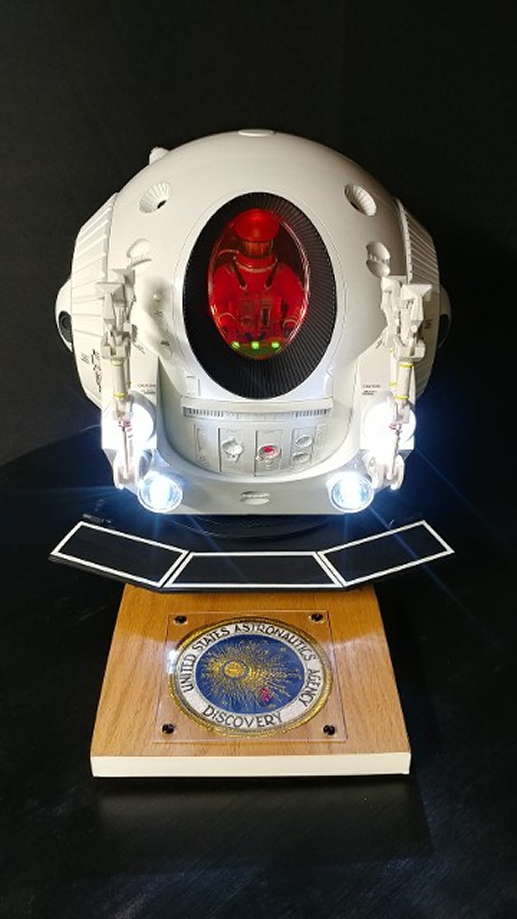
Nearing completion of the model, we decided to fabricate a display base. The DC power socket which had already been mounted to the center of the Pod's lower recess, would accept the connection to the power plug, mounted in the center of the cylindrical support. I added small sections of felt pads to the upper edge of the support, to cushion the fit between the Pod and the cylinder upper edge. The lower part of the display was made to look like the Pod Support Pallet, on which the Pod rested while onboard the Discovery, in the Pod Bay. The simulated Pod Turntable is 7.5" in diameter, and the entire Support Pallet is 10.3" long and 11.25" wide overall.
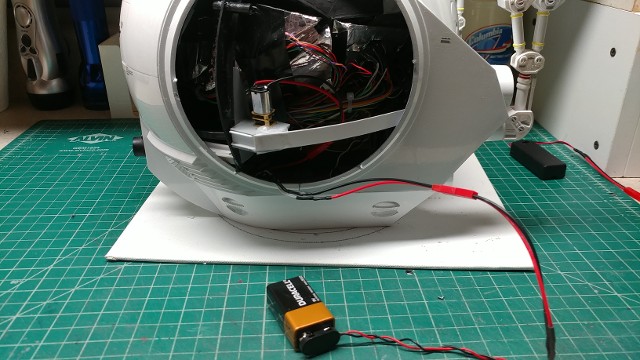
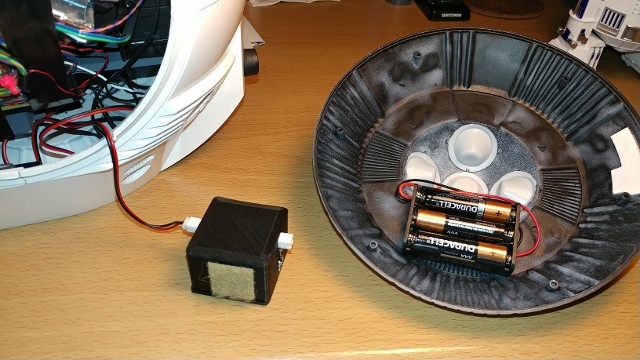
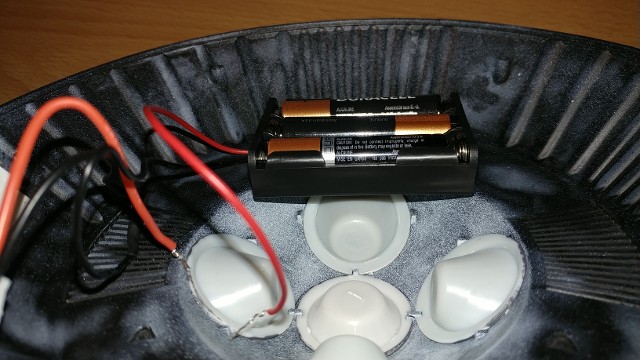
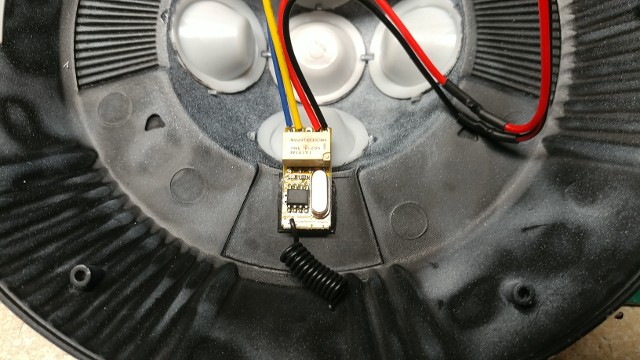
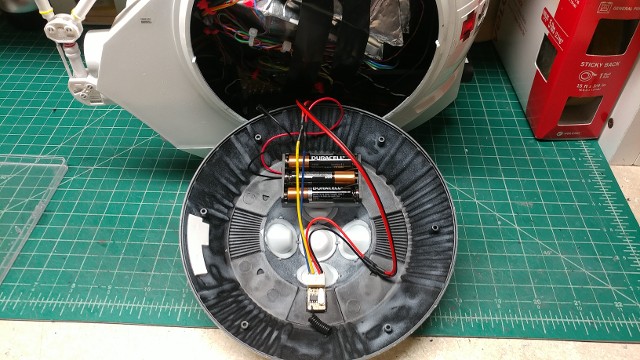
As you may realize from other project pages, no project is ever really finished. The EVA Pod seems to be no exception, as we have worked with Carl Darby, another avid modeler who posts on the Facebook "Building the 2001 EVA Pod Model" page, and who is now building and selling MP3-drive Sound Modules for use in these Pod models. The kit comes with the module, a small speaker unit and a battery pack that holds three AAA batteries.
We had always planned to leave both RCS "muffs" un-cemented, so that they could be removed for updates, servicing and the like. As the Pod Door Drive uses up the extra space in the right muff, the left side became the residence for the battery pack.
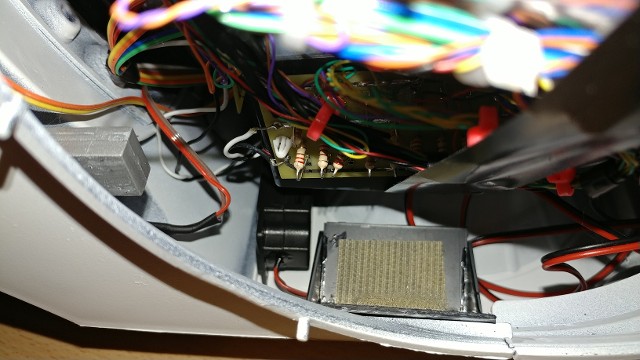
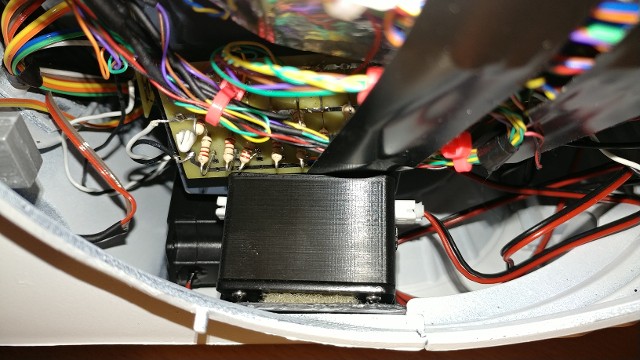
We created an ABS plastic cradle to hold the Sound Module, with the assistance of a Velcro swatch on the bottom. The Wireless Remote Receiver PCB was so small that it tucked into the wiring space on the lower left side and gets its 9V power from the incoming 9V power supply feed.
My sincere thanks go to:
>> VooDooFX, for the LED Lighting Kit. A great place to start...
>> Ya-Monsters!, for the LED Support Panels and the Display Screen "Translides"
>> The Age of Plastic, on Shapeway.com, for the rear panel 3D printed detail set.
>> Max Greuter at Figurative Parts, on Shapeways.com.com, for the David Bowman pilot figure.
>> Amazon.com, for access to the miniature motor & gearbox assembly that allowed the Pod Door Dive to function and the Wireless Remote Switch we used to run the sound.
Carl Darby from the 2001 EVA Pod page on Facebook, for providing the outstanding Sound Module,
And, most of all, to Moebius Models, who made this beautiful model kit a reality, after all these years. Thank You Very Much!
Here's a link to the larger photos in the ShutterFly Album Page:
https://link.shutterfly.com/T4S4MGONvyb
We also have a brief YouTube video, showing the completed model.
https://youtu.be/spL1PzOF8fg
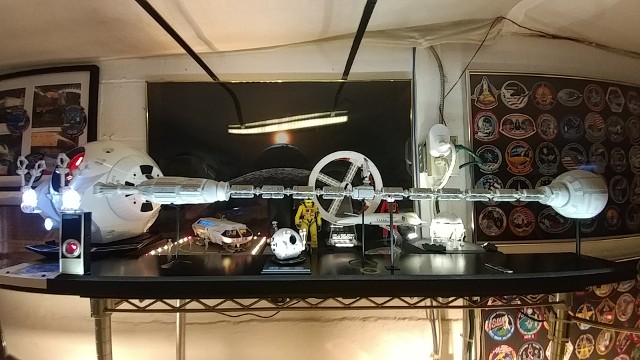
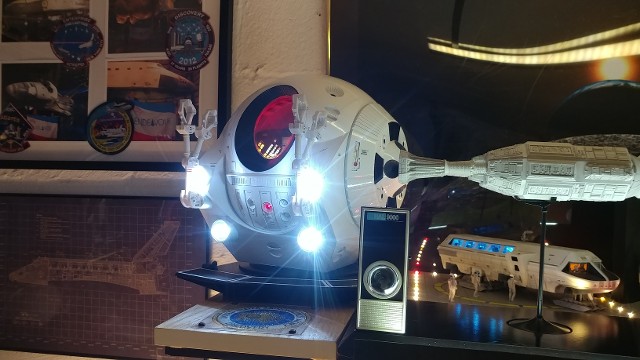
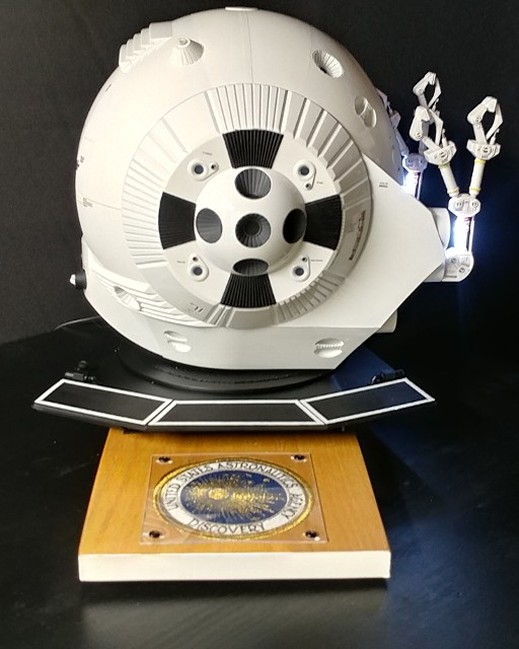
Here's some closing shots of the new EVA Pod as part of our 2001 Display Shelf.